

I have yet to meet a person who doesn't like the dollar store. I knew when I went there tonight I would be looking for supplies to make a wreath. I have seen countless wreaths on Pinterest and wanted to make one of my own. I surprisingly had a hard time finding what I needed, so I definitely got creative. Here's how I made my wreath, enjoy!
Materials:
From the Dollar Tree:
Splatter Screen
2 tubes of small ornaments
Silver spiral branches
Ribbon
Small Clipboard
Door Hanger for wreath
From my stash:
Green paint
Black Paint
Scrap tulle and lace from yard sales

The first thing I did was paint the clipboard on the back side. I used the green paint for this.

Then I painted our name on the clipboard with the black paint. Another idea I had was to use letter stickers.

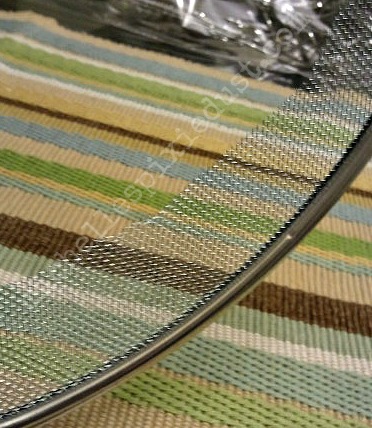
I swore I have seen foam wreaths at the Dollar Tree before. So either they were out, or I'm just crazy. This is where I needed to improvise. I ended up buying a splatter screen from the cooking isle.

I took some scissors and cut the center out, leaving about 2 inches around the edge. Regular Scissors worked fine for this. CAUTION: The wire is sharp! Be careful throughout the rest of the project.
To fill out the wreath, I used some tulle and lace I had stashed from yard sales. As you can see, the old tulle was only 25 cents.

To begin filling out the wreath, I cut the lace and tulle into strips about 2 inches wide and 8 inches long. There was no exact measuring going on here, but I know it helps to give an estimate. I tied the strips in knots all along the wreath body.

I just kept cutting and tying until I thought it looked full enough.

Next I inserted the silver branches behind the knots I made with lace and tulle. I cut the branches down to right below the curl at the end. I left just enough room to insert the end of the branch and have the curl sticking out of the side.

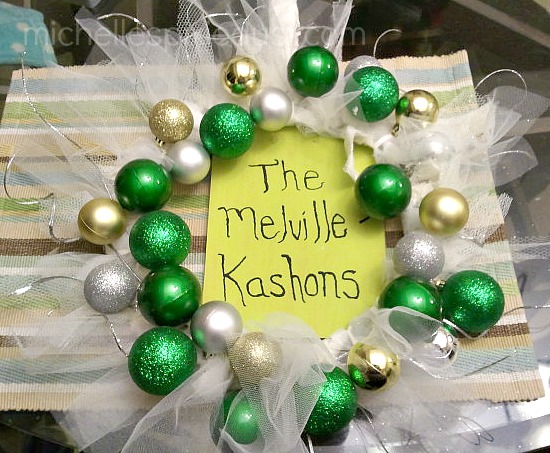
After that, I began to tie on the ornaments. The green ones were larger than the silver and gold, so I tied those on first and distributed them evenly. I cut about 6 inch pieces of ribbon, threaded them through the top of the ornament and tied them onto the wreath. I followed the same process with the smaller silver and gold ornaments.

To finish off the wreath, I wrapped the handle with lace and tied some tulle into a loop and bow through the handle.
Then I tied ribbon through the back (really the front) aka non-colored side of the clipboard, using the clip as a hanger. I then tied that ribbon to the top of the wreath, so the clipboard hangs behind the wreath. Here is the finished product:
Here's what the wreath looks like on the door:

Overall, this was a really fun and easy project. Not to mention CHEAP! I only spent $7 at Dollar Tree. It's nice to have a wreath with a personal touch.

Super duper cute wreath! Thanks for showing your readers how to make it. :-)
ReplyDeleteThank you! :)
DeleteThat is such a great idea! It's so cute!
ReplyDeleteAww Thanks! This is the first one I have ever made, and I am pretty happy with it :)
DeleteSo fun! Just came across your blog. Would love it if you linked up on my blog hop www.w-t-fab.com/search/label/bloghop. Also let me know if you'd like to follow each other!
ReplyDeleteI would love to! Thanks!
DeleteIt's so wonderful to be able to create such awesome projects with Dollar Store items!! Thanks for sharing with my NO RULES Weekend Blog Party :)
ReplyDeletePaula
lifeasweknowitbypaula.blogspot.com
I totally agree! Thanks Paula!
DeleteThanks for linking up this week.That was clever using the splatter screen. I hope you had a chance to enter the giveaway 2 days left. If not pop over anytime! @ DearCreatives.com you will find link on most recent posts. Hope you get a chance to link up again!
ReplyDeleteOOh I'll have to enter! And thanks! :)
DeleteWhat a great wreath! I love shopping at the Dollar Tree for my supplies. Never thought to use the splatter screen! I've done tissue paper wreaths similar to the way you did yours. I may have found an alternative to my coat hanger shaped like a circle. :)
ReplyDeleteLol, thanks Stacey! :)
DeleteHa Ha! What a great use for one of those splatter screens!
ReplyDeleteThanks for linking to a Round Tuit!
Hope you have a fabulous week!
Jill @ Creating my way to Success
http://www.jembellish.blogspot.com/
Thanks! That took some creativity for sure, lol
DeleteSo cute! We'd love for you to link this at our party! http://housewivesofriverton.blogspot.com/2012/11/riverton-housewives-round-up-42.html
ReplyDeleteThanks! I just linked up!
DeleteWhat a sweet little wreath!
ReplyDelete